It’s not a didactic section (when needed I’ll link related pages on manufacturer site) but so as to explain my approach to recording.
Capture and recording at the best, vocals is a basic work for a sound engineer.
When you list a radio program or a song with a speaker/singer you must understand speech/lyrics and every nuance and dynamic of their voices. Here’s why when I record a singer I pay great attention to capture his perfomance at the best. But, check it out, it’s not just a matter of microphone tipology.

Sometimes vocals recording session become an album cover
I draw up a list by five points.
1) Let him hair down
A good perfomance need a quiet environment in a comfortable feel with a warm half-light and with a presence of few people (better a trusted person or none) to realize a relaxed situation without any kind of embarassament. For me it’s important to create an empathy with the singer.
Generally, lead and back vocals need two hours to record. I consider some breaks to listen takes or simply to drink a cup of coffee.

My live room with a warm and diffuse half-light
2) Suitable acoustic environment
It’s basical working into a room with a flat and balanced response and with a small reverberation. The top is a room with variable acoustic (from absorber to diffusive).
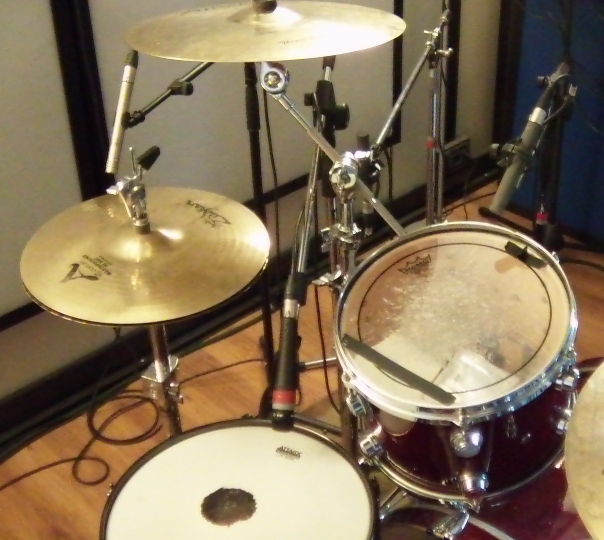
My room is made with double side panels on the walls, one absorbent and one reflective. By this way I can change room response quickly. Generally, I use all panels with absorbent face to record vocals or half-share panels reverse when recording drums, strings or acoustic guitar.
I projected a quadratic diffuser panel, Acoustic Environment DRQ13, to balance my control room’s acoustic response and sometimes I use they on my live room.

Quadratic diffuser panel Acoustic Environment DRQ13 on my control room
3) Setting up a good level monitoring
Obviously monitoring is a main step.
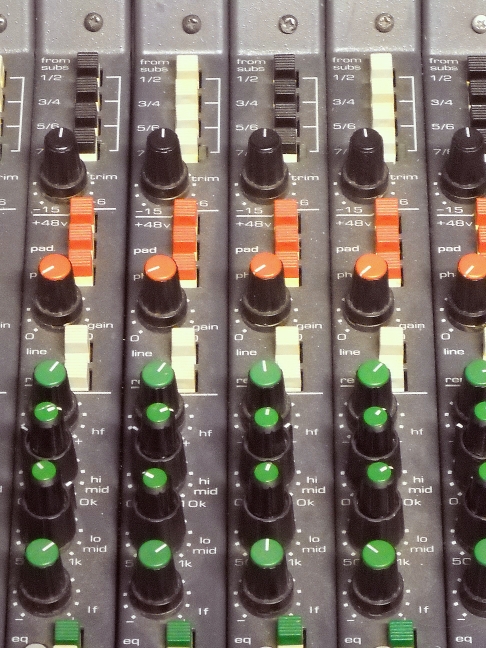
I prefer create a customized mix for singer with a separate sub-master for pre-recorded accompaniment (musical base). I use my SPL MTC 2381 CUE Mix controls to balance vocals and sub-master.

SPL MTC 2381 (pic from web)
My monitoring phones are Sennheiser HD 25 sp (closed with 75Ω impedance) or AKG K240 (semi-open with 600Ω impedance). The latter has a superior sound quality but it has a low sensibility and some interference troubles.
Once occasion a singer used my monitor speakers to listen base because he found a live perfomance feel.
Generally, I use a light, short reverb like large room.
4) How choosing the best way to record…
Drop verse and chorus one by one or at once?
I usually ask to the singer to perform two or three times at once to create a right feel and to facilitate his focus. After I record all verses at first and all chorus to follow meaning not to lose his feeling and to find a better perfomance.
I choose in real time better takes and edit they to listen an almost definitly compilation of session.
5) …and the better microphone for his perfomance
Be careful: I wrote “to record his perfomance” not just his voice.
I generally use a Neumann U87ai (I bought two of it) but I always check if the nuances and the sound are linked with the essence of the song.
I tried Cloud JRS-34, a beautiful ribbon microphone, to record a youth singer and to add a warm and mellow presence.
Sometimes I use Electrovoice RE-20, a typical dynamic broadcast microphone, which it’s perfect to record speech on intro or bridge to create a deep, in-face sound.
I use two matched microphones with different gain to record very wide dynamic session like growl or scream voice.
About explosive consonant or breath, obviously, I use pops filter to minimize them but, sometimes, I turn capsule by 90° and I switch the microphone polar pattern to omnidirectional. Air flux overtake microphone without noisy effect.
-

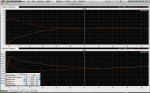
- Test Neumann U87ai vs. Cloud JRS-34
-

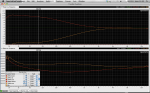
- Electrovoice RE20
FAQ
– Do you add an equalizer or compressor during recording? No, I don’t
– Do you add automation on vocal track during mix? Yes, I do (if needed)
– Can you record my song in your studio? Yes, with pleasure 😉 Contact me
If you got a question, please tell me 🙂
Cheers,
Lorenzo
Copyright © 2013-2014 by iuatwest. All rights Reserved.
This material has been copyrighted, feel free to share it with others; it can be distributed via social media or pingbacks or added to websites; please do not change the original content and, provide appropriate credit by including the author’s name @ http://iuatwest.com and your readers shall not be charged by you under any circumstance.